Leads can be differentiated in your account to send particular messages to by assigning them Disposition Tags.
Navigate to the Account Settings page in the left hand menu, and choose the Manage Account tab.
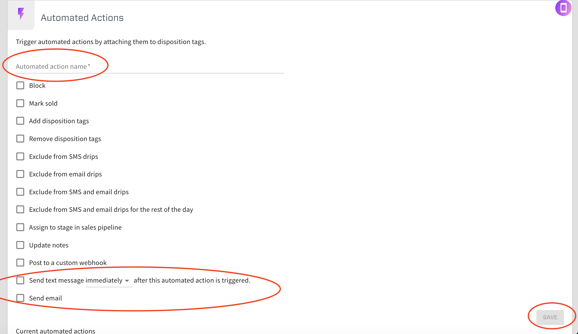
You will want to set up the Automated Action, which will be triggered immediately after the lead is assigned the Disposition Tag. Scroll past your Disposition Tags to locate the Automated Actions section. Name the Automated Action whatever you would like and choose what actions then you would like to trigger. Be sure to choose the "SAVE" button in the bottom right corner after setting up the Automated Action.
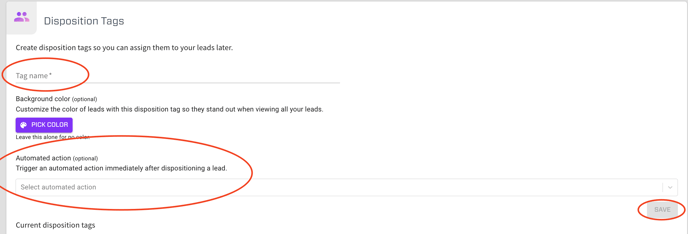
Now that the Automated Action is created, scroll to the very top of this page to create the Disposition Tag to assign to leads. You will name the Disposition Tag first, and then select the Automated Action created to trigger immediately after dispositioning the lead. Be sure to choose the "SAVE" button.
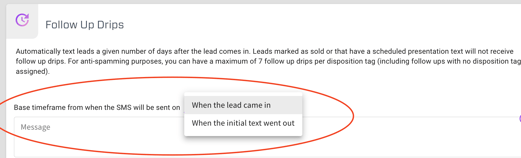
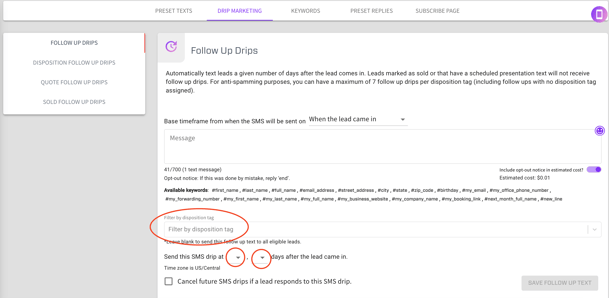
The final step is creating the SMS Follow Up Drips for these leads to receive particular follow up messages. Navigate to the Marketing page in the left hand menu, choose SMS from the dropdown menu, and select the Drip Marketing tab. Enter the follow up message to send these particular leads, choose the Disposition Tag from the drop down menu, and then select the specific date and time you want these messages to send. It is also recommended to utilize the rotating phrase feature and trickling your SMS Drips to help avoid text messages being flagged for spam or in other words, undelivered due to a carrier violation. Don't forget to choose "SAVE FOLLOW UP TEXT" after creating each drip message.
Please note, Follow Up Drips are based on either when the lead came in or when the initial text went out. In other words, whenever the lead was received or texted for the first time. Alternatively, you could set up Disposition Follow Up Drips, which are instead based on the date the lead was assigned the disposition tag.
You can assign leads the Disposition Tag depending on how you are adding the leads or receiving the leads in Ringy:
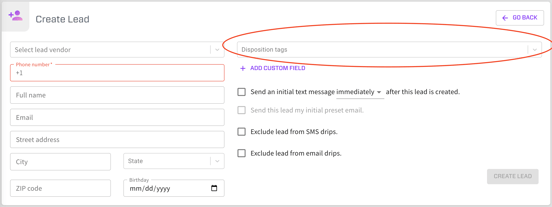
1. If you are manually creating leads, you will be able to assign these leads a particular disposition tag in the Disposition Tags drop down menu.
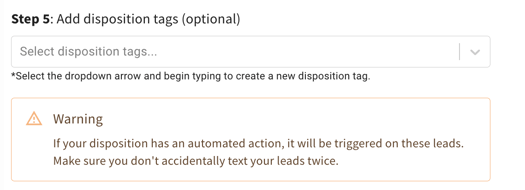
2. If you are Uploading a CSV File of leads, you can assign the Disposition Tag to all leads being uploaded in the file in step 5.
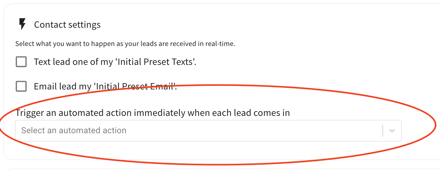
3. If you are receiving these leads via a lead vendor integrating into your account, you can update the Contact Settings section for this vendor. Navigate to the Lead Vendors page in the left hand menu, and click the purple pencil beside the specific lead vendor. Under the Contact Settings section, you can uncheck the options "Text lead one of my 'Initial Preset Texts" as well as "Email lead my 'Initial Preset Email." Instead, you will be able to select an Automated Action from the drop down menu you have created to trigger immediately when each lead comes in. After doing so, be sure to choose "UPDATE LEAD VENDOR" in the bottom right corner of the page.
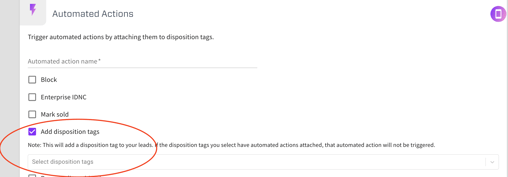
If you are also wanting specific SMS Drip Marketing Messages to send to these leads, you will need to ensure your Automated Action has the action chosen to "Add disposition tags" so the Disposition Tag itself is also applied to the lead and what SMS Drip Marketing messages can then specifically be filtered by.